Home Blog Page 2

Post Affiliate Pro vs Omnistar

0
Post Affiliate Pro vs Omnistar Affiliate Platforms

Affiliate Marketing has become one of the best tools of the marketing these days, and running your own affiliate program has never been much simpler than with the softwares available these days. I will make a comparison of POST AFFILIATE PRO vs OMNISTAR here to help you choose the best software wisely.

What is Affiliate Marketing ??

In affiliate marketing, you encourage others to promote your products/services on your behalf for which you share your margin with them.

It’s like setting up your own army (of affiliates) who work hard to promote your products/brands/services every day and night and thus increasing your business’ sale.

And I believe this margin sharing is worth investing, since you are paying for the conversions only, whereas in case you hire a marketing professional or you invest in advertisements you will be paying either for the salary of the marketing professionals or for just the impressions of your product’s ads.

In case of affiliate marketing, your burden of work also reduces, as there are these affiliates who will be taking care of your monthly sale, just to maintain their own monthly income, and now as a business owner you can focus your time on other works better.

POST AFFILIATE PRO vs OMNISTAR – Run Your Own Affiliate Program for Marketing your Business & Products

For starting an online affiliate marketing program you need a website (live & fully functional) to which you can link your affiliate marketing software.

If you already have a website, then what you need now is just a platform for affiliate marketing.

The 2 most noted (& widely used) affiliate marketing softwares present in the market are:

1). POST AFFILIATE PRO

2). OMNISTAR

More or less both of them are good in their own terms, and I will be discussing here POST AFFILIATE PRO vs OMNISTAR comparison.

POST AFFILIATE PRO:

This Affiliate program software allows you to easily start your affiliate campaign for your business.
post affiliate pro

Features-

1). USER INTERFACE

  • It provides Multi Lingual Support, which is a good thing if you are looking for broader target audience.
  • It has Customizable Affiliate interface
  • Pre designed themes are available
  • It offers Web 2.0 based client-server architecture
  • Provides Multiple Merchants/Affiliate Program Administrators, furthermore it also have an option for Mass Payments.

2). TYPES OF COMMISION

Talking about the most important part of the marketing, commission..

  • Post Affiliate Pro offers you a Multi Tier commission system
  • You can make use of Commission Groups option
  • Another important feature is an option for providing your valuable marketers “Performance rewards”
  • Action Commissions (action based on your website, whether for click or for impression it’s upto you)
  • You can use “Recurring Commissions” option for providing recurring commissions to your marketer.
  • You can even Split Commissions with Post Affiliate Pro
  • Another amazing feature is you can even provide Lifetime Commissions to your marketers using this software to attract more affiliate marketers from the market.

3). PROMOTIONAL BANNERS

It provides several options like promotional links, promotional banners, etc to you right in your dashboard, through which your marketers can promote your business well.

4). EARNING REPORTS

You can track earnings in your dashboard and the commission split also, which is an important part of your business marketing campaign.

5). VARIOUS TRACKING METHODS

It also offers, several tracking methods based on ip tracking, cookie tracking for 30 days window.

In short it offers you all the things necessary for starting and successfully running an affiliate program.

Try Post Affiliate for Free

OMNISTAR AFFILIATE SOFTWARE


osi omnistar affiliate

Omnistar on the other hand also provides most of the features mentioned in the Post Affiliate Pro (just because they are major competitors to each other in the market) other than that following are the features that makes Omnistar different from Post Affiliate Pro.

Features

  • It provide you a “Social Share option” through which your affiliates can directly share the campaign on the social media
  • You can make use of Popups on your website for promoting referral program
  • Get Feedback from your customers with an available option for getting feedback through Omnistar’s dashboard
  • Your affiliates can even create coupon codes for your referring customers

Try Omnistar Affiliate Software Free

Conclusion: POST AFFILIATE PRO vs OMNISTAR

These two softwares are capable of helping you launch an Affiliate program for your business.

It will be better to try both of them for free in the starting and make your own decision as per your requirements.

Since both of them are good, it depends which one suits your requirements better.

You can ask your queries below, do not forget to share!

Things to Consider When Entering Into A Business Partnership

0
Things to Consider When Entering Into A Business Partnership

Partnership is probably one of the most simplest form of doing business ( ofcourse after “sole proprietorship”).

All you have to do is to enter into an agreement with the other partners, agreeing on the terms on which the business will be handled and managed by the partners.

But before you go for the agreement there are few things every partner must keep in his/her mind.

Things to Consider When Entering Into A Business Partnership

1). Compatibility Check

Just like choosing a life partner, you do several compatibility checks before you enter into a marriage or engagement you must think several times about if that other partner/s is/are compatible with you.

Since once you enter the agreement you will be working together and if you guys do not understand each other well then the Business is gonna suffer for sure.

2). Partners must be complimentary to each other

It is important in a Business Partnership that the things that you can’t do well for a business your partner/s must be able to fill up that skill gap well.

Every partner need to be master in their own field, and all of them must be taking care of their own work departments. This will make them mutually exclusive at their work and thus will make each of them more valuable asset for their firm.

Since they will not be putting their nose in other’s work, partnership will go well and each of them will be able to grow their own departments well working together progressively

3). Common Long Term Goals

Before you enter into a Business Partnership you must enquire with the other partners about their long term life goals. It is important to have common long term goals, since your company’s future will depend upon it.

If for example one of your partner is not seeing himself/herself doing business anymore in after 5 years or say after 10 years then this is going to be tough for you to be with him/her in a same business.

4). Seriousness about the Business idea

Before Entering the agreement, whether it’s you or any of your partner.. if any one of them doesn’t have faith in the Business Idea, then he/she must not enter into the Business Agreement.

Company once formed and start running, your employees will be dependent on you and thus you have to be damn serious about your business, and should take the steps wisely.

5). Fair Share in the Business

If you are entering into a Business Partnership, it’s important that each of the partner must invest (in terms of money and hard work) in equal proportion and not just 1 or 2 of the partners doing all the work.

And all of them must get a fair share in the business’ profits/losses and not just 1 or 2 of them are taking the burden of others for some reason.

From my past business formation ( both successful and unsuccessful Business partnership attempts) experiences, aforesaid points were the things I learnt from those experiences and I truly believe each of you reading this article should seriously consider them before entering into any Business Partnership.

Drop your comments in the comment box. Wish you good luck for your business.. do not forget to ‘SHARE‘.

How to Become a Business Partner in an Existing Business in India

0
How to Become a Business Partner in an Existing Business in India

Business Partnership is the easiest way to start doing a business in any country worldwide. All you need is a partnership agreement of sharing profits and losses of the firm and providing your skills and hard work towards the growth of the company.

If you have recently planned to enter into a partnership with an existing firm, then you and that firm will be writing a new partnership deed on new profit/loss sharing terms.

How to Become a Business Partner in an Existing Business in India

For becoming a business partner in an existing firm, Section 31 of the Indian Partnership Act, 1932, says that you need the consent of all the existing partners of the firm to be ready to add you as a new partner.

And for adding a new partner the whole business terms will have to be re-written on the partnership agreement you will be signing with them.

Introduction of a New Partner

At the time of execution of the “process of introduction of new partner “, all the present partners along with the new partner (to be introduced) must be present with the witnesses.

All the partners must provide the original copy of their PAN (Permanent Account Number) Card along with the copy of residence proof.

The date on which the new partnership deed is executed, the previous partnership deed shall stand superseded.

The person introduced in the firm does not hold the liability of any previous acts of the firm, before the introduction of the new partner.

Note that the aforementioned procedure is the broad overview of the procedure and you must consult a lawyer or a CA/CS for taking valid advice regarding the subject, this article is based on the actual research I did during the formation of one of businesses.

You can drop your queries in the comment box, and we’ll try to bring in new articles written by the CA itelf related to the company startups, etc; so that you can ask them more queries in detail. Keep reading and keep sharing.

How To Make Money Using Fiverr

0
How To Make Money Using Fiverr

Fiverr is one of the largest marketplaces in the world for digital services. One can sell and buy digital services through fiverr by creating the gigs. A service offered on Fiverr is called a “Gig”. You can start selling/buying with a minimum order of $5.

On all purchases Fiverr charges purchasing fee. Orders upto and including $20 are charged with $1 and orders above it are charged with 5% of the total bill

I heard about fiverr when I left my full time job for further studying before starting up my own business, and when I was looking for freelance jobs to cope with my monthly expenses.

How To Make Money Using Fiverr Marketplace

Fiverr offers you a huge marketplace for selling your services online. All you have to do is to signup which is completely free. And create a gig for start selling.

Signup

What to Sell ??

Since Fiverr is a very huge marketplace and there are plenty of designers and digital service providers working on a same vertical, there’s a huge competition too for the common services like designing websites and designing logos.

Now, If you want to earn some good amount you must try selling services which are exclusive and are less available in the market, in that case you will be able to charge more amount.

Here are the few services which you might like selling yourself:

  • Sell Tutorials
  • Logo Designing
  • Sell Apps
  • Resell Fiverr Gigs
  • Advertising Gigs
  • Landing page designing
  • You can sell eBooks
  • Try selling Software
  • Sell Web Design
  • Video Creation & Editing
  • Banner creation
  • Photoshop editing work
  • Testimonial / Audio / Video gigs
  • Social Media Gigs for example -“get likes, followers etc.”

There are several other things which you can start selling on Fiverr and you can make easy money out of it. You must write down your skills in a list and start researching for few hours before creating any gig.

Steps to start selling on Fiverr

Step 1: Sign Up for the Fiverr

(Make Money Using Fiverr) Signup Here

Step 2: Create a Gig

create a gig on fiverr

After signing up you will see a home screen like displayed below, just go to the selling option and you will see “Create a gig” option.

Create a gig with a “Gig title” as per your interest of work, select the category and enter the appropriate tags to increase your visibility among the various similar gigs.

You can set plans and prices for selling, with the title, description, ad images along with additional charges that you will be charging the buyer.

deliver work on fiverr

Step 3: Publish Gig

After successfully adding the images and other required details that you want to display on your gig. Save and Submit the gig for start selling.

get paid on fiverr

Conclusion:

Overall Fiverr is a good source of earning money online by just sitting at home. And I have seen people earning thousands of dollar per month here. All you need is a proper planning and catchy gigs.

You can ask a query related to Fiverr and feel free to share your views in the comment box below.

How To Optimize Blog Posts For SEO

0
How To Optimize Blog Posts For SEO

If you are already writing a blog, it’s quite possible you might already be aware of few basics of Search Engine Optimization techniques. But if you don’t.. then don’t worry this article will make you aware of all the aspects of optimizing a blog post for Search Engines.

Truly speaking what I have researched so far about SEO in past years of my blogging, I can tell you for sure.. “always try to write with a natural flow, write for the viewers and not for the search engines”

Google’s bots know well which article is grammatically accurate and which one is manipulated for SEO. Surprised?? don’t be.. Let’s move forward to know what can we do for optimizing our article.

How To Optimize Blog Posts For Search Engines

Salient points to keep in mind before start writing a blog post:

1). H1 should be used only once in a post, in case of wordpress blog title is by default h1 and you can’t use H1 anywhere in the post.

Your main keywords must come in the H1.

2). Use H2 afterwards for your next heading, for wordpress users H2 is the first heading you can use. You must use main target keyword in H2 for better Search Ranking

3). Use keyword in the first 150 words

4). Make sure you do not use the keywords many times that it start spoiling the meaning of the sentence. Just try to use them naturally in the sentence.

5). Use focus keyword in ‘alt’ tag of the image. Also do not forget to use atleast 1 image in the article to improve your visibility through ‘image search results

6). If you are using meta tags then do not forget to add the keywords in the meta title and meta description.

7). Use h1, h2, h3, h4, h5, h6 in descending order and do not repeat h2 and h1 in your article.

8). Try to write your post in between 500 to 2500 words

9). Use keywords only wherever you find necessary. Unnecessarily using the keywords in post can be marked by search engines as spam.

10). Link other related articles and site sources wherever necessary, it could help increase your domain authority and higher the authority higher you will get preference in search engine ranking.

This Video explains how does google works (created by the google itself)

Criteria followed by Search Engines:

1). Prominence of the keyword

How early in a page keyword appears

2). Preference of the tags for finding keyword

  • Search engines start looking for keywords from the page title (meta title),
  • then it finds the keyword in the post url
  • then it goes to page description (meta description),
  • after that it goes to heading tags in the article, priority wise it first goes to h1 to find the keyword (in case of wordpress h1 is same as page title),
  • then it finds the keyword in the first two paragraphs of the article,
  • then it goes further to the next headings and the contents written after the headings and so on..

3). Frequency of the keyword searched

Number of times a keyword appearing in an article. Be careful placing the keywords, as i suggested before do not place them unnecessarily, but use them carefully and naturally in the sentences other wise your article might reach the spam list of search engines.

4). Site Popularity

Few search engines these days give priority to the popular sites and the number of times a article is liked and reshared over the social media.

5).Grammatical structure of post

Some engines including Google consider grammar in their ranking calculation. Google bots are capable of distinguishing between a overly optimized article and a naturally written article.

6). Synonyms

Most of the search engines these days finds the synonyms in the article and treat them as the keyword itself. So you can use synonyms of your focus keywords in your article and google will find it with the original keyword

These were the most important points and criterions followed by the search engines these days to rank a particular post in the search results. Do keep them in mind before you start writing your article and you will definitely see your article in the top ranking withing a week or two.

Conclusion

The conclusion of this article is that we must not write articles for Search engines, but should write it for the readers, just keeping in mind the aforementioned salient points. If done properly search engines will automatically find your article for the top ranks.

Since Google is earning its major incomes from SEM or paid ads, there is not much left for SEO and now what matters most is the quality of the content, since the google bots are able to read the content and understands whether the article is about the searched keyword or not.

Thus each of us need to focus on the content and the keyword finding preference list of the search engines to rank on the top of the results.

Make sure your articles are well indexed in the google and other search engines then only search engines will be able to find your articles for ranking. You can use google search console or other webmaster tools to index your website.

Drop your valuable comments. Do not forget to SHARE

How to Switch Hosting Without Suffering Downtime

0
How to Switch Hosting Without Suffering Downtime

Switching to a new hosting account can sometimes be a daunting process. But if you are following these steps then, I can ensure that your website migration will be smooth and safe.

How to Switch Hosting Without Suffering Downtime

Step 1:

Buy the new web hosting plan first, and make sure you don’t cancel the previous one before the switching of website is complete (most crucial thing to keep in mind)

Also, do not tell your previous web hosting provider about that you are about to switch hosting, since no company would let their customer go, and probably they can cause hinderance to your migration process.

Step 2:

Now you will have two web hosting accounts both of them with different hosting provider at a time (i.e. your current host and the hosting you want to switch your website to)

Now the importance of this step lies in the fact that you must “keep the file structure same” as that was before in the previous hosting.

You can either use FTP client like Filezilla to download all the files with the same file structure first in your local machine (computer) and then connecting your computer to the newly bought hosting account and uploading the same file structure in there.

Or if you are using cpanel in both the hosts then you can take complete Home Directory backup from the backup wizard in your cpanel and you can directly upload this file into your cpanel of the new hosting account through the backup and restore option.

Sometimes the bandwidth of your hosting account doesn’t allows you to take the home directory backup (when the file size is large) in that case you can go to the file manager through the cpanel of your previous host and select the public_html folder and click on compress button from the top menu in the file manager.
Choose the  Gzip Tar. compression and download this compressed folder from the previous host and upload to the file manager of new hosting, and decompress it there and replace the default public_html folder with the one you just extracted.

Step 3:

Download the database from the previous host and upload it to the new one from the backup and restore option in cpanel in both the hosting accounts. This can also be done via SSH or cPanel’s phpMyAdmin.

Step 4:

Take the backup of your data because sometimes files get corrupted during this whole migration process and could lead to reuining up your hard work.

Step 5:

While emails do not normally transfer, still you can archive your emails from the old host. You can do this by making a POP3 connection to each email address; this way all the old emails are downloaded to your local computer. The new host will not have those old emails, but the new host will be able to fetch new emails.

Step 6:

Now when you have a copy of your complete website on both the webhosting accounts, it is the right time to change your domain name’s DNS in the domain name provider’s control panel.

You may need to contact the new host to find out what DNS settings you will use for your domain name.

DNS name servers usually looks like this (replace “yourhostname.com” with your host’s actual domain name):
ns1.yourhostname.com
ns2.yourhostname.com

Step 7:

After making the DNS changes or I can say after changing the nameservers of the domain name to the new host’s you should wait for atleast 48-72 hours which is advised by the hosting providers, since DNS changes takes this much time to completely start fetching the files from the new hosting server.

During this 48-72 hour waiting period, your DNS will be propagating worldwide and your site will be randomly loaded from either the old host or the new host. After completion of this period, DNS cache will be refreshed properly and your website will start loading the files from the new hosting server.

Step 8:

You can now contact your old hosting provider and cancel your previous hosting account, because they are not required anymore. If you originally bought your domain name from the old host, kindly do not cancel your domain registration.

If you have successfully completed all the aforementioned steps then congrats.. your website is now successfully migrated and that too without suffering any downtime at all!.c

Beginner’s Guide: How Do I Change My Hosts File?

0
Beginner's Guide: How Do I Change My Hosts File?

How Do I Change My Hosts File?

What Is a Hosts File?

The hosts file allows you to set IP addresses for a domain on your local computer that may override the authoritative DNS. This will allow you to see what a domain will display if it is pointed to a different server. This article covers the following topics:

  • How to Recognize a Hosts File?
  • Why Change the Hosts File?
  • Editing Your Hosts File
    • Browser Plugin
    • Editing System Files
  • DNS Flush

How to Recognize a Hosts File?

The hosts file is a plain text file, and is usually named hosts. A typical hosts file will have one or more lines referencing your local computer (as ‘localhost’) and will resemble this:

127.0.0.1 localhost
123.45.67.89 www.example.com
#98.76.54.32 www.another-example.com

A hosts file can be edited to override your network settings and thus allow your local machine to view a website prior to the DNS changes propagating.

Why Change the Hosts File?

Changing your hosts file is a temporary measure to preview your site as it will load from your Itsmydomain server. This lets you make changes on a server other than the one loaded by your domain when visitors access your page.

This is very useful for development purposes, as you can work on your site on an alternate server using a hosts file while visitors may still visit and use your existing site.
Itsmydomain recommends changing your hosts file for development. It provides the most stable development environment. Other methods can cause configuration issues after development is complete.

Editing Your Hosts File

To change the host your domain loads from, you will need to know the correct IP for your server. Itsmydomain servers will require you to use the IP address displayed in your cPanel.

You can view your IP by accessing your cPanel

Once you know your server IP address, there are 2 ways that you can change the host your domain loads from. This article will cover each of them:

  • Browser Plugin
  • Editing System Files

Note: Remember to undo and changes you make after you’re done viewing your site, as any of these changes will prevent your domain from loading the correct DNS.

Browser Plugin

Many browsers have plugins that will allow you to make this change without loading your site through a proxy. If you need to test SSL installation or payment gateways, this may be vastly preferred over using third party web proxies.

We recommend the following plugins for Firefox and Chrome, depending on which browser you prefer:

Both plugins require your desired host and your cPanel IP to load it from. Each plugin will have different instructions to use, and may differ based on version.

Editing System Files

Lastly, you may change the host your local computer loads your website from by directly editing your system’s hosts file. This method will be easier if you are an experienced user of the operating system on your local PC.

All operating systems will have a hosts file like our example:

127.0.0.1 localhost
123.45.67.89 www.example.com
#98.76.54.32 www.another-example.com

Add the second line in this example to your hosts file, with the following edits:

  1. Replace “123.45.67.89” with the IP address from your cPanel.
  2. Replace “www.example.com” with your actual domain name.

You may deactivate a line to undo this change by prefacing it with a “#” (as in the third line above). This will cause the line to be ignored.

Click the links below to expand specific instructions for how to make this change your desired operating system:

▷ Windows

▷ Mac OS X

▷ UNIX

DNS Flush

Once you have modified your hosts file, it is recommended that you flush your DNS so that the new changes can be implemented more swiftly. DNS flushing must be done using command line. Depending on your computer’s OS, there will be different commands.

How to Flush DNS in windows 10?

0
How to Flush DNS in windows 10

A very common issue you may encounter is when your local DNS resolvers cache a domain name to IP mapping. When you’re trying to go to the domain, it’s actually pulling up an old IP address (cached on your own computer) instead of looking for a new one and finding the correct record.

This article will give you the steps required to clear your cached DNS records.


How to flush DNS in Microsoft Windows 10

  1. Close the application you’re currently working with, such as an internet browser or email client.
  2. Press the Windows Logo + R keys together simultaneously. This will cause the Run dialogue window to appear.
  3. Type cmd in the text box and select OK.
  4. When the black screen appears, type the following command and hit enter:ipconfig /flushdns
  5. Restart your application (browser or email client).

Mac OS X

It is important to note before following these instructions that the command in step 4 is specific to Mac OX 10.10 Yosemite and will not work on prior versions of Mac OSX as this command changes between versions. It is advised that you follow Apple’s instructions to check your version number, and look for the command specific to your version of OSX.

  1. Close the application you’re currently working with, such as an internet browser or email client.
  2. Navigate to your Applications folder.
  3. Open Utilities and double click on Terminal.
  4. Type the following command and hit enter:
    sudo discoveryutil mdnsflushcache;sudo discoveryutil udnsflushcaches;say flushed

  5. Enter the admin username and password when prompted.
  6. Restart your application (browser or email client).Don’t worry if either command says something like “Not found”, and continue to restart your application.

OSX Daily has excellent lists of prior OSX versions and commands:


Linux

Note: Different distributions and versions of Linux may have slightly different commands due to differences in configuration. One of the commands below will probably work.

  1. Open up a root terminal window (Ctrl+T in Gnome).
  2. Type the following command and hit enter:/etc/init.d/nscd restartYou may need to use sudo depending on your installation instead:sudo /etc/init.d/nscd restartSome distributions support this command:sudo /etc/init.d/dns-clean startOr support this command:sudo service nscd restart

    Some installations may have NSDS located in another directory, like the following example. You may need to locate where it is installed to be able to execute the correct command.

    /etc/rc.d/init.d/nscd restart

  3. Restart your application (browser or email client).

Which CRM is Best for Small Business

0
Which CRM is Best for Small Business

There are plenty of CRM platforms in the market, some are free, some are cheaper some offer better services. But the question is “which CRM is best for small business”.

CRM enables business owners and salespersons by helping them streamline their sales process by improving inter-departmental collaboration, and maintaining business relationships with customers.

Customer Relationship Management (or CRM) is often referred to as a system, or software/technology that enables organizations to manage relationships with their customers, vendors, and/or suppliers.

And to be frank, every CRM provider has its own USP and thus they differ in a way or two. But on an whole they all serve the same wholistic service combining each and every angle of “Client – Business relationship”.

It enables both the customer as well as the service/product provider to understand each other’s needs well resulting into better deal.

There are several types of CRMs available in the market, out of which we have to compare them with our business needs first.

Broadly, CRMs are of two types:

  1. On Site / On Premise
  2. Cloud based

As the name suggests, “On-site CRMs” are installed, managed and handled on site and under the same premises.

On the other hand, Cloud based CRMs are installed, run and hosted on Cloud and are mostly handled by the CRM providers.

5 Best CRM for Small Businesses :

  1. Zoho CRM
  2. Salesforce
  3. Hubspot
  4. Bitrix24
  5. Pipedrive

ZOHO CRM –

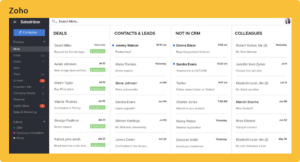
Zoho CRM is one of the most widely used CRM by SMBs and also by some big businesses.

zoho CRM

Benefits:

  • Zoho CRM caters to SMBs as well as big corporations with its easy to use interface, customizable modules, social media features and automation.
  • This CRM platform lets you define workflows and rationalize your everyday tasks, manage leads, and automate processes.
  • It can also be integrated with Twitter and Facebook and allows you to reach out and engage with leads quick and easy, at just the right time.
  • If you’re looking for a free CRM, it’s available for up to 3 users, although it is also limited feature-wise.
  • Customization is limited, but users can send 50 individuals mails per day and have access to 10 email templates.
  • The paid Standard edition of Zoho upgrades the usability factor with robust sales forecasting and KPI tracking.
  • The Enterprise edition adds even more sophisticated tools, such as stage-by-stage sales funnel tracking and customizable data comparisons across teams, users, regions, and more.
  • Zoho’s advanced features can be accessed with the Ultimate edition, which comes with an exclusive 30-day free trial.

Drawbacks:

Zoho is popular among small businesses. They have been able to achieve this by staying boot-strapped and free of exit-oriented investors. Zoho CRM is a value-centric offering for businesses of all sizes and types.

They are good for small businesses, in terms of value for money.

Pricing:

A free version is available for up to 3 users. 15-day free trial for paid versions.
Standard edition is $14 per user/month, billed annually.
Professional edition is $23 per user/month, billed annually.
Enterprise edition is $40 per user/month, billed annually.
Ultimate edition is $52 per user/month, billed annually. Exclusive 30-day free trial.

Salesforce –

salesforce crm

Benefits:

  • Salesforce offers a customizable CRM app with deep, well-developed tools for sales processes and team collaboration and many integrations.
  • This is a robust system, allowing Sales managers and sales teams to build up very complex task management systems. Salesforce automates many tedious tasks and decision-making processes out of the workday.

Drawbacks:

  • No offline functionality.
  • Salesforce is an absolute behemoth of a company, and their scale appears to have had some negative repercussions on support, ie. the CRM’s help desk is not always super responsive.
  • Support staff turnover makes it hard to build long-term, working relationships with specific support team members who know your company.
Pricing:
  • Essentials plan for all-in-one sales and support is $25 per user/per month, billed annually.
  • Professional plan offering complete CRM for any size team is $75 per user/per month, billed annually.
  • Enteprise plan offering deeply customizable sales CRM for your business is $150 per user/per month, billed annually.
  • Unlimited plan for “unlimited CRM power and support” is $300 per user/per month, billed annually.
  • A 14-day free trial is available for all plans.

Hubspot –

hubspot crm

Benefits:

  • HubSpot is a big name in the CRM market and offers basic features for free. It handles the basics of the sales process, with lead management and cross-channel tracking of customer interactions.
  • Zapier integration allows you to share information across apps like Slack and Google Sheets.
  • The paid version has Sales Hub add-on, with AI assistance, deeper prospect insights, and high-end automation.

Drawbacks:

HubSpot CRM’s customization options are limited, which are not going to be good if your organization have specific requirements.

Pricing:
  • HubSpot CRM is free, and the number of users is unlimited.
  • Marketing Hub, Sales Hub, and Service Hub add-on packages are $50 each per user/per month, billed monthly.
  • HubSpot CMS starts at $300 per month, billed monthly.
  • All-inclusive Starter Growth Suite starts at $113 per user/per month, billed monthly.

Bitrix24 –

Bitrix24 is a local-hosted or cloud-based social intranet and project management platform from the the company of the same name that also contains core HR (HRMS) and CRM features as well.

bitrix24 crm

It features live activity streaming, a layout similar to a social networking site’s, “Like!”-ing, document storing and sharing, chat and video conferencing, time tracking and a calendar, a Gantt chart, and a messaging system.

It possesses CRM features (CRM database with invoices, sales reports, and customer outreach) focused on client interaction, and an HRMS with an employee directory, a company structure, and a self-service portal.

Pricing varies:

The self or local hosted version can be obtained for about $3300 or $9900 with a one-time license purchase, depending on needs (the higher priced tier is very similar but contains multiple intranets for various departments).

A free cloud based version 12 users; no external users are allowed however, with overall 5GB space allotted.

The Standard cloud pack can be obtained for $99 per month and supports unlimited employees and external users, with 100GB of space.

The Professional package comes for $199 and supports unlimited usage and storage, along with all of that in lower plan plus workflow / approval processes, expense management, work reports, and a company’s own domain name.

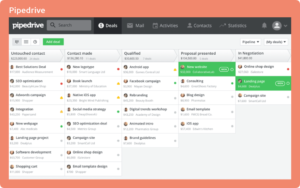
Pipedrive –

pipedrive crm

Benefits:

A visual, easy-to-use tool focused on the sales process and tracking contacts. Lets you build multiple sales pipelines and customize stages for niche product and service contexts. Syncs cross-channel information and eliminates repetitive admin tasks.

Users of Pipedrive’s Essential plan can use Smart Email BCC to sync emails to Pipedrive. Users of the Advanced, Professional, and Enterprise plans will gain access to an in-app inbox, and more sophisticated, automatic email sync compatible with everything from Gmail to QQ Mail.

A Chrome extension allows you to use it as a full-fledged Gmail CRM. With its customer, resource and timeline filters and overview capabilities, it can also be used as a project management tool.

Drawbacks:

The Zapier integration is a bit complicated to get up and running.

Pricing:

Pipedrive is available at four feature levels.

The Essential plan is $14.90 per user/per month billed annually, and $15 billed monthly.
The Advanced plan is $24.90 per user/per month billed annually, and $29 billed monthly.
The Professional plan is $49.90 per user/per month billed annually, and $59 billed monthly.
The Enterprise plan is $99 per user/per month, billed annually.
A 14-day free trial is available for the Essential, Advanced, and Professional plans.

Best Payment Gateway In India For Small Business

0
Best Payment Gateway In India For Small Business

Payment Gateway is the most crucial part of any small – medium – large scale online business these days. In India, after the Indian Govt’s push for taking the economy and majority of transactions online to bring-in transparency, we all need to know now how a payment gateway works, and who provides the best payment gateway in India for receiving online payments for your small or big business.

Best Payment Gateway For Small Business

1). CCAvenue

CCAvenue is one of the best payment gateways, available for all sizes of businesses.

It is free to use for the 1st year hence your customers will be paying 2.0% per transaction as TDR. Furthermore, after 1 year you will have to pay INR 1200/- per financial year as an annual maintenance charge.

It is easy to integrate with your apps and websites, it provides you several options like customizable checkout cart, where you can add your own logo and contact details so that the payment page looks like a part of your website itself.

Process of setting up and documentation takes around 4-7 days and you can start collecting payments online onwards.

Best for Sole Proprietors, Partnership firms, LLP as well as for Pvt Ltd.

2). Razorpay

It was started by some IITians, and no wonder they have always got their name in to the lime light due to their innovations in technology and ofcourse just because it was started by IITians again 😉

Previously their integration process was the most tedious task to perform, but with time they have improved in everything now.

Now you can collect payment on whatsapp, sms, email, QR, or literally through any method easily. And with these changes they have become my new favourite and pushed Instamojo in simplicity towards second spot now!

3). PayTM

PayTM has recently started its service of online payment gateway, but the best thing is it is easiest to integrate. They charge TDR of 1.99% per transaction.

You can even send and receive payments via PayTM app through just your mobile number.

Best for all sizes of businesses, most suitable for the small businesses.

4). PayuMoney

Part of PayuBiz, Payumoney is also easy to integrate payment gateway, whose support is undoubtedly excellent. You will get a dedicated account manager even after you signup with them.

There process is simple and integration is simplest. They have options of integration for all the carts and platforms.

Best for all business sizes.

5). Paypal

This American payment gateway provider is the most easy to use, easy to integrate in addition it is ready to start receiving and sending payments online worldwide, even in several currencies.

All you have to do is to signup with Paypal, fill up your business details in their form and add the bank account details.

After doing this you will receive 2 unique amounts between INR 1to INR 2 in your bank account with them. And you just have to enter those 2 amounts in the paypal dashboard to verify it’s your bank account.

And you are all set to receive payments online, that too in several currencies.

Best for small and medium scale Global Businesses.

6). Instamojo

Instamojo is not that big in the market but no doubt they have come up with the most easiest way to collect payment.

Moreover with Instamojo you can even collect payment by sending link through whatsapp, facebook, instagram or even emails.

It is the best payment gateway in India for small businesses for start collecting payments online since it requires no IT skill at all to setup.

Best for small and medium scale businesses.

How payment gateways work?

Payment gateways make you their submerchant hence letting you start receiving online payments by providing their secure website and IT infrastructure.

In return of which you have to either pay them per transaction amount or annual fixed charge or both.

Process Involved:

Drop your queries in the comment box and also let us know if you have find any other payment gateways better than these mentioned.

Do not forget to SHARE

Moosend